Recipes and More

Sunday, May 16, 2010

Brilliant Brussels

Brussels sprouts have got to be one of the most pushed-to-the-side-of-the-plate veggie of all the leafy greens. This is something I've never understood. Perhaps those who hate these little sprouts, which resemble small cabbages, had some terrifying experience as a child with awfully prepared greens. Boiled or overcooked, the sprouts release the full potential of their bitterness which kids find unappetizing. Or perhaps it's just the natural dislike of vegetables that tends to run in children. Personally, I have never hated Brussels sprouts in my life. Although, I may have been reluctant at first to try them at first because a lot of kids answer the question, "what is your least favorite food," with Brussels sprouts.

My mom raised us with the firm belief that a child gains a dislike first and foremost from their parents. If a parent shows their child that they don't like something or says something like, "you may not like this, but try it," the kid might learn, before even putting the food in their mouth, that the food isn't good. Of course, there are certain foods that people have to "grow-into" or is an acquired taste. For instance, I didn't like avocados until I was in high school. When I was younger, the taste was too overwhelming. But as a result of my mom's decision to not let us not try anything, there is hardly anything I don't like. In fact, my least favorite foods are processed foods which taste often too sweet and unnatural to me.

As far as Brussels sprouts, I'm not going to sit here and try to convince you to try anything. My point is, you never know. Perhaps your taste palate has changed and the sprouts may surprise you. It also helps to know how to prepare them in such a way that it minimizes the bitterness and brings out the savory flavor of these little cabbages.

Delicious Pan Fried Brussels

You will need:
-12-15 brussels sprouts (you can get a big bag of brussels sprouts at Trader Joes for a good price, and I heard-- pre-cut too!)
-olive oil (about 3 Tablespoons)
-salt (I prefer granulated sea salt)
-Parmesan cheese (optional)


1. Start by rinsing the sprouts in water. Pull off any browning or shriveled leaves off. If your Brussels sprouts are whole and not cut yet, cut off the stem of the Brussels sprout at just the base so that the leaves remain attached. Cut the sprout in half lengthwise through the base.

2. Heat a large skillet with the olive oil for a minute or until the oil starts to shimmer. Put the sprouts in the pan face down in the oil. Be careful not to burn yourself with the oil. Sprinkle the salt over the sprouts in a few short movements over the pan.

3. Let the sprouts cook until the faces are a light-medium brown color (careful not to burn!) Turn over the Brussels and toss in the remaining oil for about a minute or two more.

4. Serve immediately. Additionally, you may choose to serve with grated Parmesan on top.


Happy Cooking!

-Kristin

Saturday, May 15, 2010

Crepe Cravings

Not wanting to deal with a pile of dishes from some complicated dinner, I decided to satisfy a craving for crepes instead. Crepes have been my Dad's breakfast specialty, since I was little. They would always be the special occasion breakfast, a request on birthday mornings, and sometimes we'd be lucky enough to get them on an average weekend, creating an extraordinary start to Sunday. So crepes, to me, are a little piece of home, and a love my Dad gave to me when I was a little girl. They always seem to make an ordinary meal unexpectedly special.

Crepes are also something that I've had in many different cultures. Walking through the crowded, brightly colored shops in Japanese malls, you will almost always find a crepe shop with options as delicious as bananas, whipped cream, and chocolate, to crepes as unimaginable as hot dog with ketchup and lettuce. In Japan, they serve you the crepe in a paper cone which holds in all of the goodies wrapped in the wonderful golden crepe. I've also had crepes in Amsterdam which were served in huge portions, crepes as big as serving platters, grilled flat with thinly sliced apples and cinnamon or spinach and melted brie.

Part of the magic of crepes is that no matter what you put in them, they almost always taste amazing, whether as simple as butter or a pile of fresh veggies and decadent cheese. Growing up, we'd always pile the inside of the crepe high with fresh sliced strawberries and whipped cream, and my Dad taught me that the simple combination of lemon and powdered sugar was unbeatable.

Tonight, I used what I had in my fridge which included pre-shredded "Mexican mix" cheese from Trader Joes, sliced ham, and fresh chopped parsley. I made enough for about 4 medium crepes that were a little thicker than normal, but had to make more batter to make enough for dessert crepes. Yum! I used the Joy of Cooking's "Sweet Crepe" recipe for this concoction that, despite the name, works just as well for savory crepes.

Joy of Cooking's "Sweet Crepes"
Recipe makes 4-6 medium crepes depending on thickness (with my toppings, it made 4)

You will need:
-1/2 cup flour
-1/2 cup milk
-1/4 cup lukewarm water
-2 Tablespoons melted butter
-2 eggs
-1 1/2 teaspoon sugar
-pinch of salt

-various fillings/toppings including shredded cheese, ham, herbs, parsley, etc (for savory) or thinly sliced apples, sugar, butter, cinnamon, etc. (for sweet)

1. Mix all crepe ingredients together (obviously not including the toppings) in one bowl with a whisk, combining well (it can be a little clumpy, but smooth as possible)


2. Spray a small/medium sized pan with non-stick spray or spread a small amount of butter, just to cover the pan. Heat for about a minute on medium low heat.

3. Pour about 1/4 cup batter into the pan while holding the pan in the air and simultaneously tipping the pan side to side and around to spread the batter, evenly as possible, in a thin layer around the pan. (This is the hardest part! Don't get discouraged if you get it wrong the first couple times. My Dad is the master at this and taught me well, but I used to get frustrated when the crepe would cook too fast for me to spread it around or I created holes in the layer. If this happens, just add a little more batter and swirl around over the missing parts.)

4. Depending on the type of crepe you're making, you can add toppings into the wet batter on the top side of the crepe. Tonight I added cheese, ham, and parsley into the batter. This would be the time to add any items you want coked into the crepe rather than sitting on top.

5. Check the bottom of the crepe carefully with a spatula (try not to break it). Some people like their crepes dark, but I like my crepes on the light-brown side. So when they're looking like this, I slip the spatula under the crepe and in one fluid motion, flip it over! Let it cook until the color is to your liking.

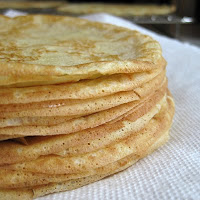
6. Slip the crepe carefully from the pan onto a plate. You can add any other toppings you want at this point. For example, if you made a dessert crepe, you may choose to cover your crepe with a dollop of whip cream or a sprinkle of powdered sugar. As a fun option for a group of people, you can serve a pile of plain crepes in a big stack with bowls of various ingredients for people to help themselves. SERVE and enjoy!

I hope you try making crepes and remember: be creative! These are quick and simple and perfect for making a memorable Sunday morning (or night!)


Happy cooking!

-Kristin

Thursday, May 13, 2010

Yummy, Easy, Impressive Asparagus Risotto

School is finally over which is a relief because that means I can start to actually cook again. For the two weeks that exams took over my life, I found myself surviving on the repeated meal of baked mac n cheese and leftover chocolate cake from my birthday a couple weeks ago. After that ran out, I don't even remember how often or what I ate, my entire concentration was on staying focused and getting myself through finals. So you can imagine the state of my apartment, not to mention my kitchen. It looked as if it hadn't been cleaned in a month. Absolutely disgusting! Now that I have a chance to breath, and the summer weather is starting to sneak in, I was able to spend the beginning of my day cleaning and organizing everything in my kitchen.

I wanted to cook something for lunch that simultaneously fulfilled my desire to have real food and use as much food in my fridge as possible. Pulling from the fridge frozen asparagus, cilantro, onions, and some garlic, I viewed my selection and got the rice from the cupboard, deciding to make some sort of rice veggie thing. I thought at first, I'll just make some rice and put the cooked veggies on top. Then I thought, "I wonder if I could make a really simple risotto out of this??" I had never made a risotto, and knowing the product's reputation, I was nervous it would be really difficult. I decided to look up someway to cook a risotto really easily and came across a recipe that used a rice cooker. What a great idea! Not only would the non-stick minimize a sticky clean-up, but I could do the entire recipe in one pot. Sounds great! I got out my rice cooker, and got to work.


Turns out--not so much work. It was so simple! And when my boyfriend tasted it, he couldn't believe how good it was. So here is my recipe for Asparagus Risotto, made in a rice cooker:

Asparagus Risotto
adapted from 's recipe at about.com
(my inspiration for using a rice cooker!)

You will need:
(keep in mind, you can be very creative with the veggies and herbs, but this worked really well for me) 
-8-10 shoots of asparagus, cut into 2 inch pieces ( I used frozen, but you can use fresh)
-1 sweet onion, diced (you can use a small yellow onion, it will work just as well)
-1 clove garlic, crushed
-2 Tablespoons butter
-2 1/2 cups chicken or veggie broth
-a handful of fresh cilantro, chopped
-1 cup rice (I used Jasmine, but you can use whatever you have)
-1/4 cup Parmesan cheese
-pepper
-rice cooker ( you can do this recipe in a medium saucepan too)

1. Turn your rice cooker on and melt butter in the bottom of the pot (I don't know what else to call the rice cooker pot thing)

2. Add onion and garlic and saute in butter for a couple minutes. If your rice cooker only has an on/off setting, put the lid on so that the cooker creates more heat to do this.

3. Add the rice and broth. If you are using fresh asparagus, add it now. Cook the mixture covered with lid for 20 min.. Halfway through the time (10 min.), stir the mixture and if you're using frozen asparagus, add it now.

4. When the time is up, make sure the rice is cooked either al dente or fully cooked and that the broth is almost all absorbed. There should still be a little wetness in the mixture (it shouldn't be dry).

5. Add the cilantro and mix in. Add cheese and a little more butter if you want. Mix in until cheese melts and is no longer dry. Finally, pepper to taste. Serve in bowls with a sprig of cilantro and (if you want to be really fancy- fresh grated Parmesan) on top. Yummy, easy, and quite impressive if I can say so myself.

Hope you try this recipe and enjoy!! Try adding different herbs and veggies. Try adding lemon. Be creative! This serves about 2 people.

Happy cooking!

-Kristin